Select Multiple
How to add and configure a Select Multiple field in the Notebook Editor.
What This Field Does
A Select Multiple field lets users pick one or more options from a list, returning an array of the selected values. It provides two display modes: an expanded checklist (where all options are visible) and a compact dropdown. By default, it displays as an expanded checklist. Use it when items are not mutually exclusive — multiple materials present, multiple features observed, multiple conditions noted simultaneously — such as “damage types”, “associated materials”, or “site formation processes”.
Adding the Field
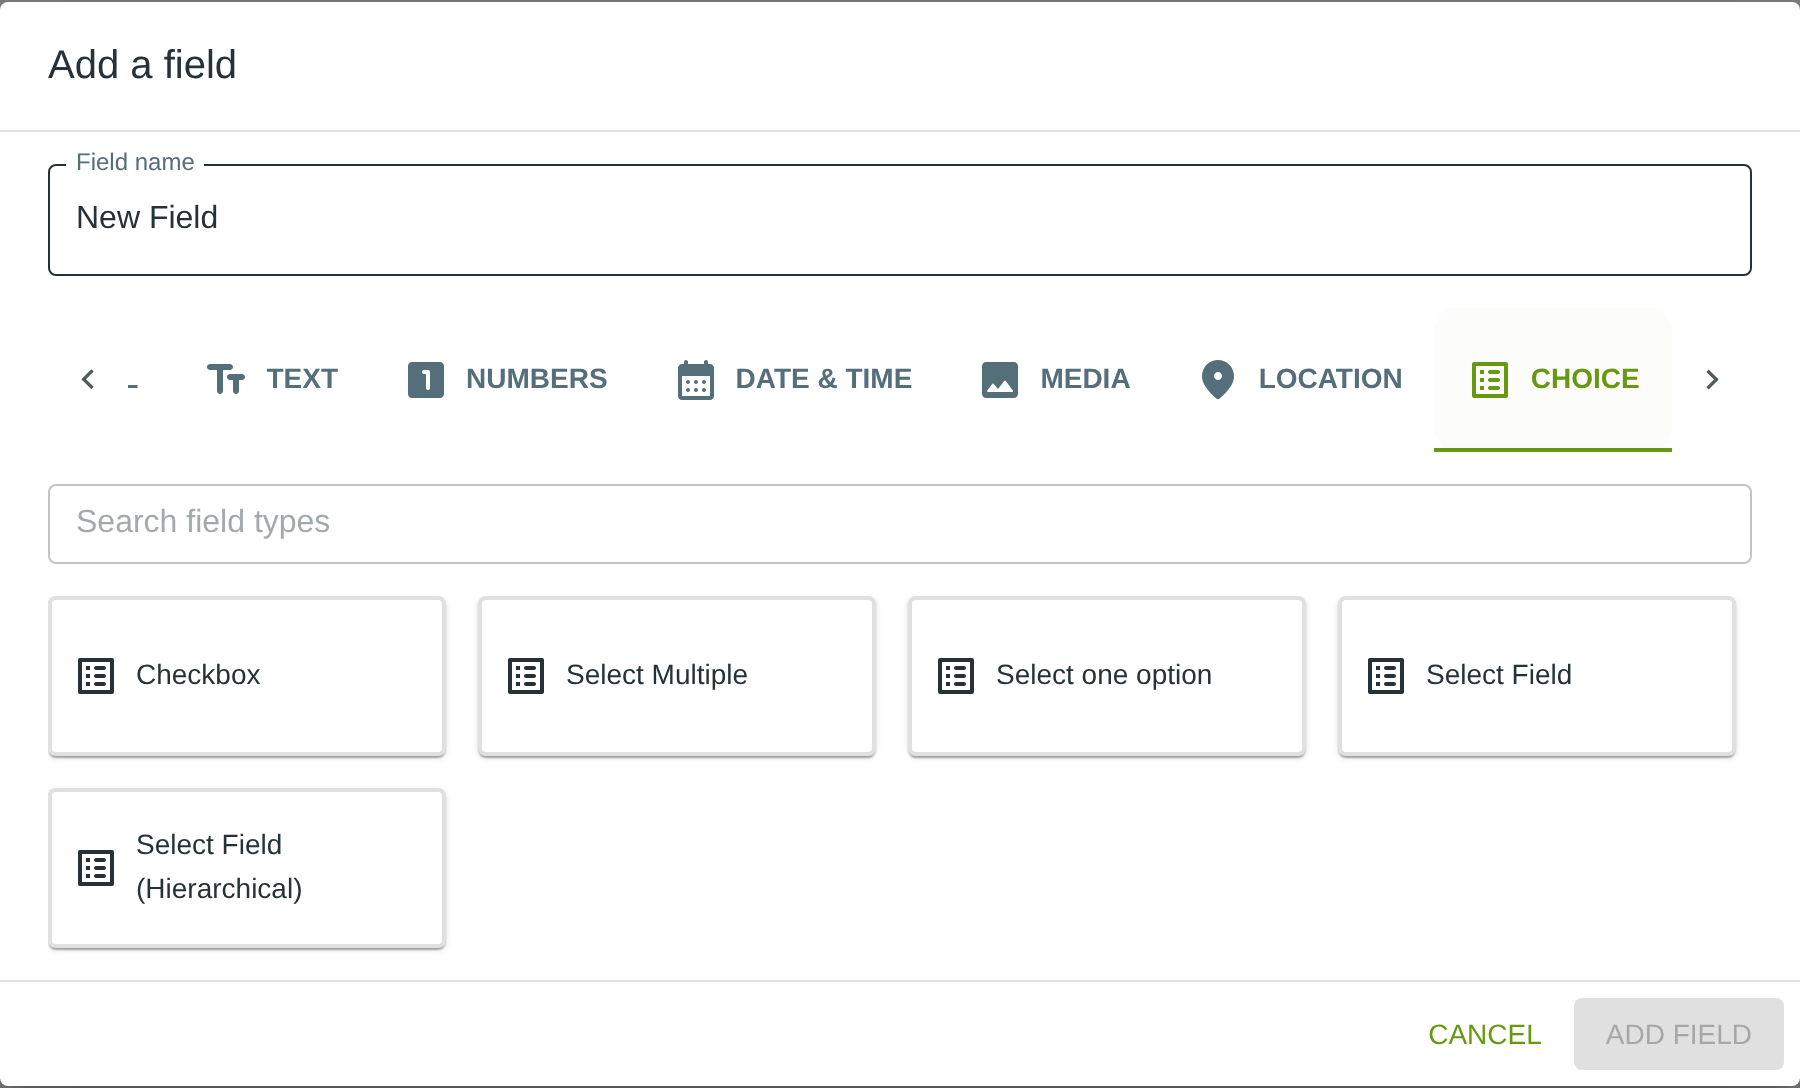
To add this field, open the ADD A FIELD dialog, navigate to the CHOICE tab, and click the Select Multiple card. Then click the ADD FIELD button in the lower right.
Note: The CHOICE tab may not be visible in the tab bar initially — click the › arrow button on the right side of the tab bar to scroll until it appears.
Configuring the Field
Click the field’s grey header bar to expand it and see its settings. For an overview of the settings shared by all fields — including Label, Helper Text, Field ID, and the field toolbar — see Field Identity and Field Toolbar.
Give the field a meaningful Label, review the auto-populated Field ID, and add any desired Helper Text.
Select Multiple-Specific Settings
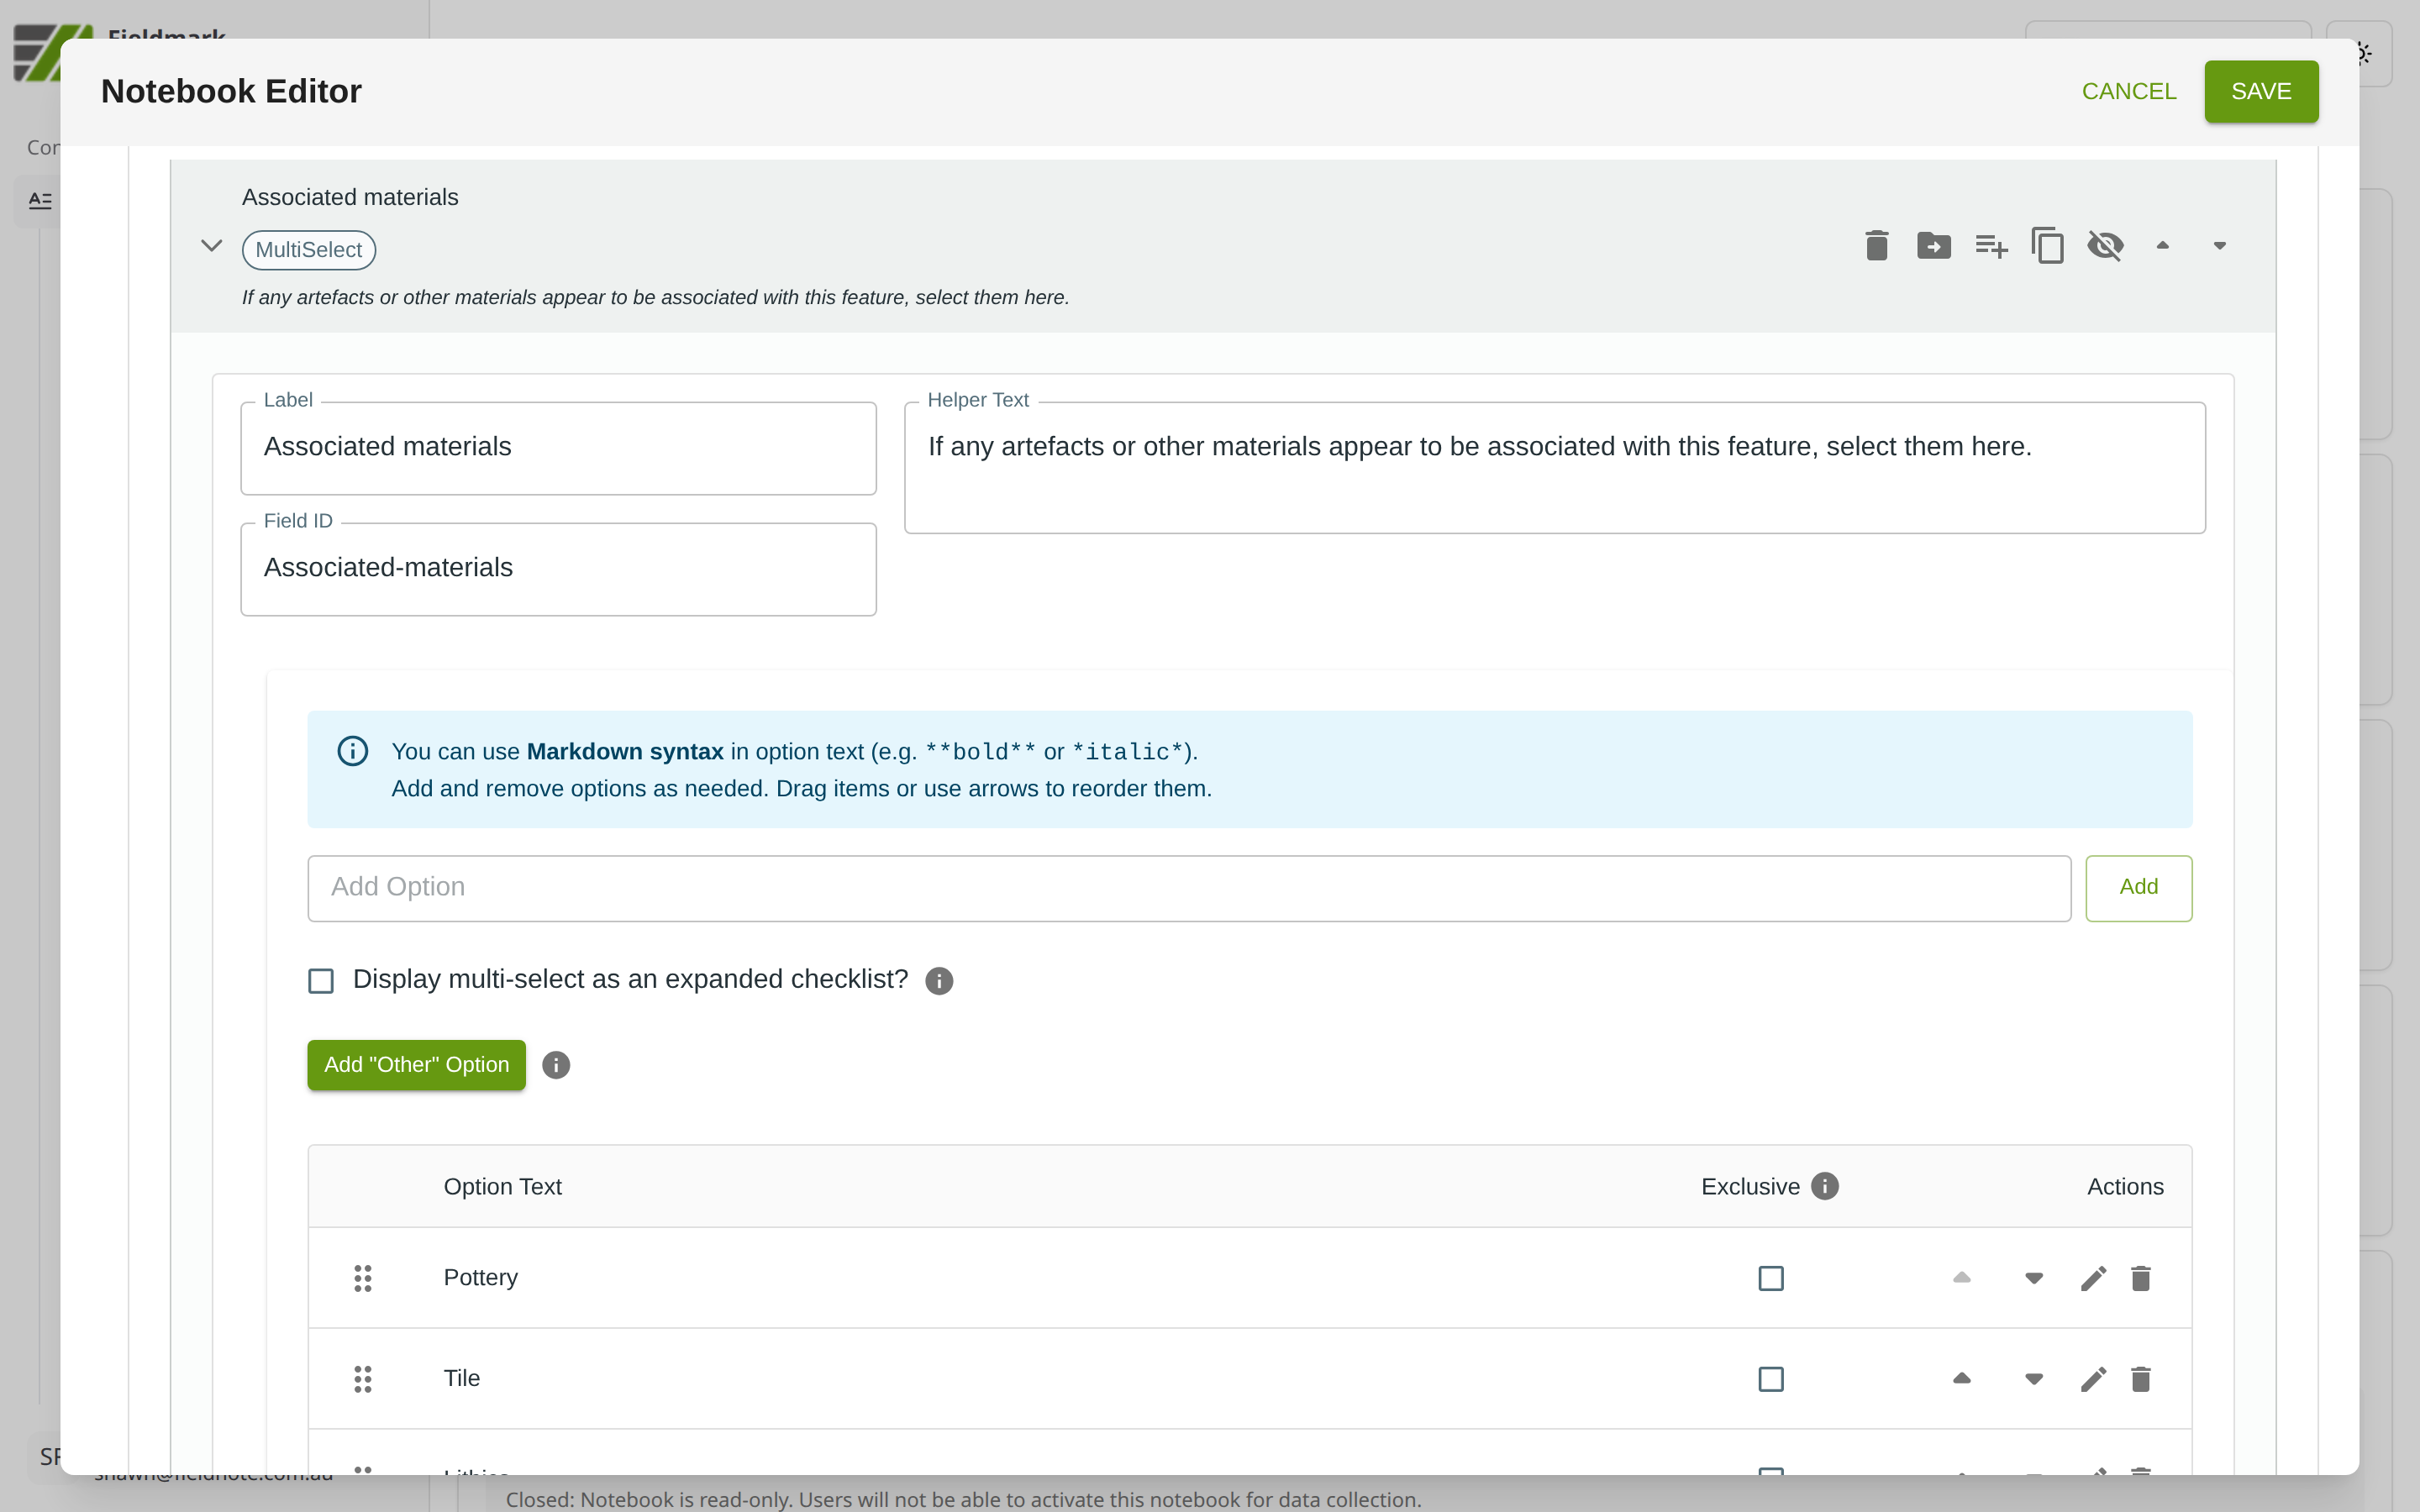
The Select Multiple field provides an options list and display controls. Below the Markdown syntax info banner, you will find the Add Option input, the Add “Other” Option button, and a table listing all current options.
Setting |
What It Does |
|---|---|
Options list |
The choices available for selection. Each option appears as a row in the table. |
Add “Other” Option |
Adds a special “Other” choice that prompts the collector to type a custom value when selected. |
Display as dropdown |
When enabled, shows a compact dropdown instead of the default expanded checklist. Best for longer lists where screen space is limited. |
Exclusive |
A per-option checkbox that marks an option as exclusive — selecting it clears all other selections (e.g., “None observed”). |
Note: As per the banner, you can use Markdown syntax in option text (e.g., **bold** or *italic*) to add emphasis or formatting to individual options.
Managing options:
To add an option: Type the option text in the Add Option input field and click Add (or press Enter).
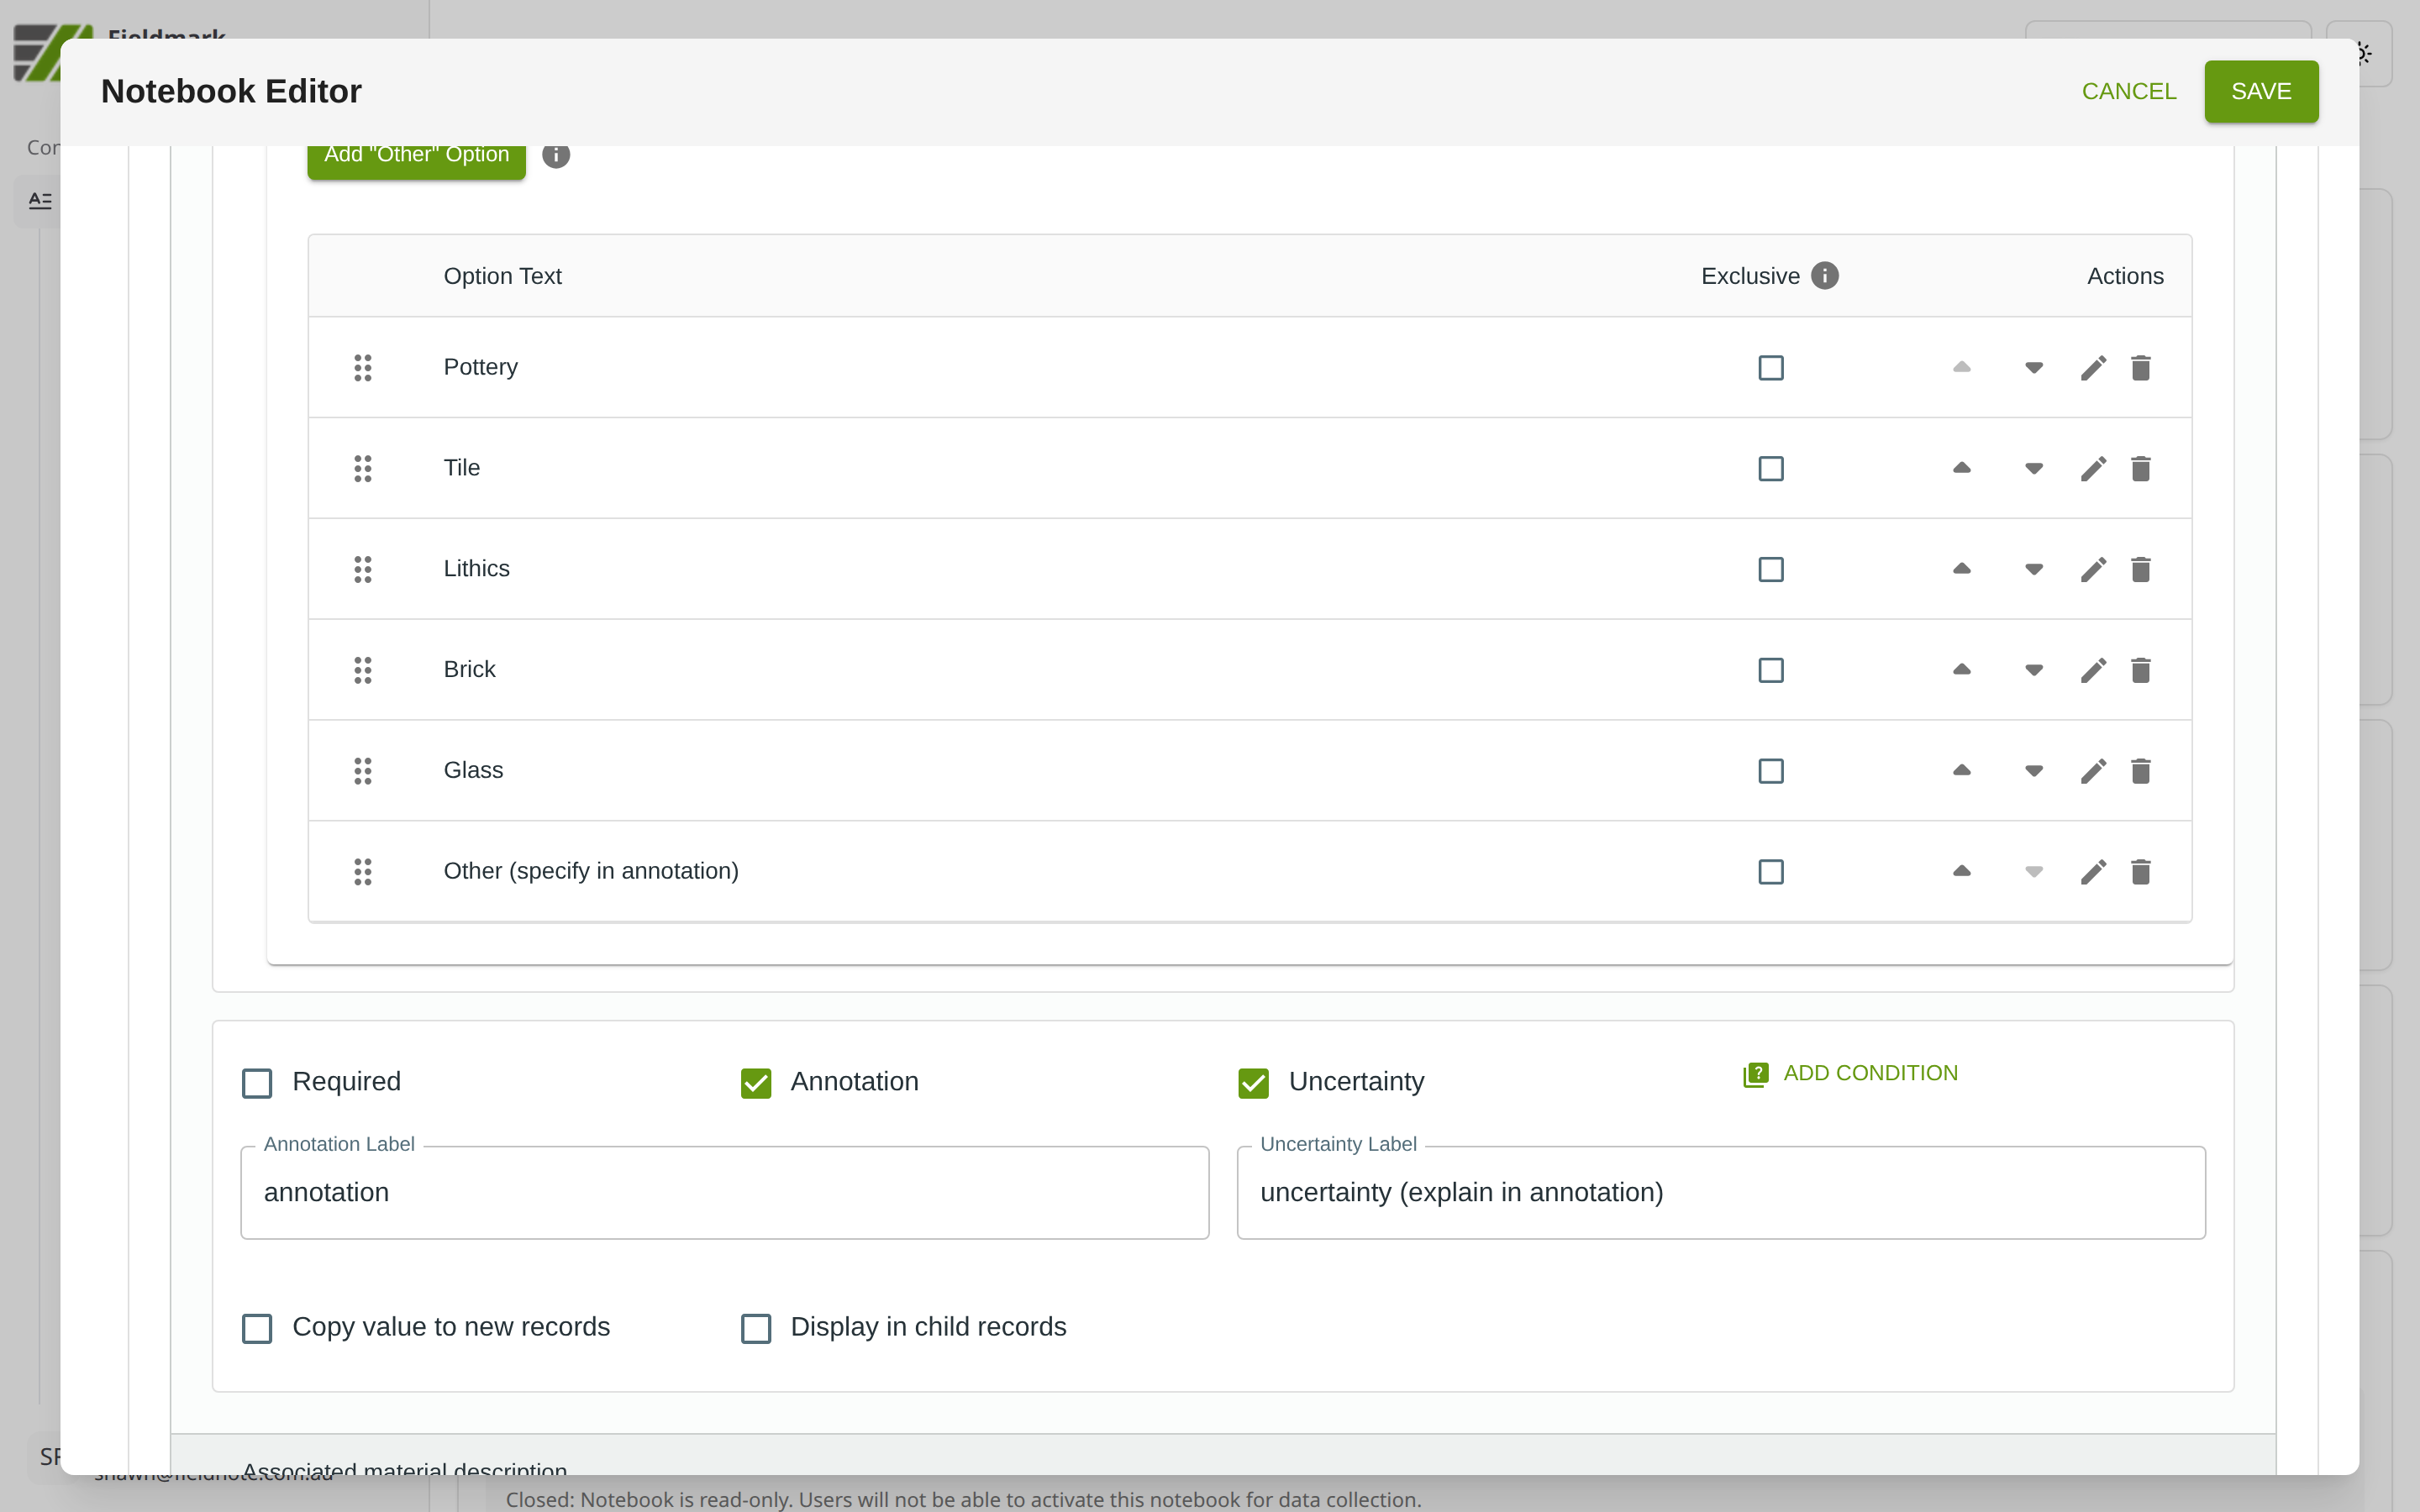
To edit an option: Click the pencil icon in the option’s Actions column.
To reorder options: Drag the six-dot handle on the left of the option, or use the up/down arrow buttons in the Actions column.
To delete an option: Click the trash icon in the option’s Actions column.
To make an option exclusive: Tick the Exclusive checkbox in the option’s row. When a collector selects an exclusive option, all other selections are cleared.
The display label and stored value are always the same — what your users see is exactly what appears in exported data.
Tips
For fewer than ~8–10 options, keep the default expanded checklist so all choices are visible at once — faster than opening a dropdown. For longer lists, enable the dropdown display to conserve screen space.
Configure exclusive options when certain choices invalidate others. For example, selecting “None observed” should clear all other selections. Tick the Exclusive checkbox on that option’s row.
Use Add “Other” Option for controlled vocabularies that occasionally need ad-hoc entries. The “Other” choice prompts the collector to type a custom value alongside the structured selections.